How to Cut Dog Nails Safely (Even if Your Dog Hates It)
Many dog owners dread nail trimming more than their dogs do. The fear of cutting too short, causing bleeding, or dealing with a wriggling pet often means nails become overgrown.
The good news is that learning how to cut dog nails safely is much easier than most people think. With the right technique, suitable tools, and a little patience, you can confidently trim your dog’s nails at home while keeping them comfortable and stress-free.
In this guide, you’ll learn:
- Why trimming your dog’s nails is important
- How often you should cut dog nails
- The best tools to use
- A simple step-by-step method
- How to cut black dog nails safely
- What to do if you accidentally cut the quick
- Common mistakes to avoid
- Answers to frequently asked questions
Why Is It Important to Cut Your Dog’s Nails?
Long nails aren’t just cosmetic.
When nails become too long they touch the ground before the paw pads, altering the way your dog walks. Over time this can lead to:
- Joint strain
- Poor posture
- Pain when walking
- Split or broken nails
- Increased risk of injury
- Reduced grip on slippery floors
A simple rule is this:
If you can hear your dog’s nails clicking on hard floors, it’s probably time for a trim. This guidance is widely recommended by veterinary and canine organizations.
How Often Should You Cut Dog Nails?
Most dogs need their nails trimmed every 3–4 weeks.
However, this depends on:
- Age
- Breed
- Activity level
- Walking surfaces
Dogs that regularly walk on concrete naturally wear down their nails, while dogs spending most of their time on grass or indoors often need more frequent trimming.
What You’ll Need
Before you start, gather:
- Dog nail clippers (guillotine or scissor style)
- Dog nail grinder (optional)
- Styptic powder
- Cornstarch (emergency alternative)
- Dog treats
- Good lighting
- A calm environment
Avoid using human nail clippers as they can crush or split a dog’s nail rather than making a clean cut.
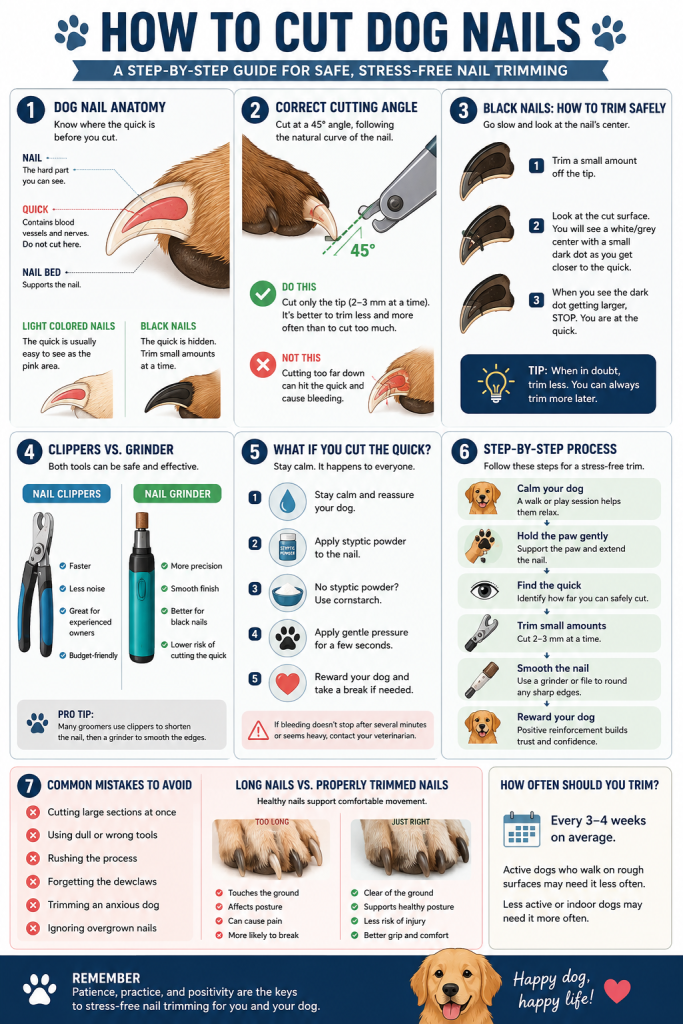
Step-by-Step: How to Cut Dog Nails
Step 1: Tire Your Dog Out
A walk or play session before trimming helps your dog relax and stay still.
Step 2: Get Your Dog Comfortable
Touch your dog’s paws regularly before introducing nail clippers.
Reward calm behaviour with treats and praise.
If your dog is nervous, don’t try to trim every nail in one sitting. One or two nails each day is perfectly acceptable.
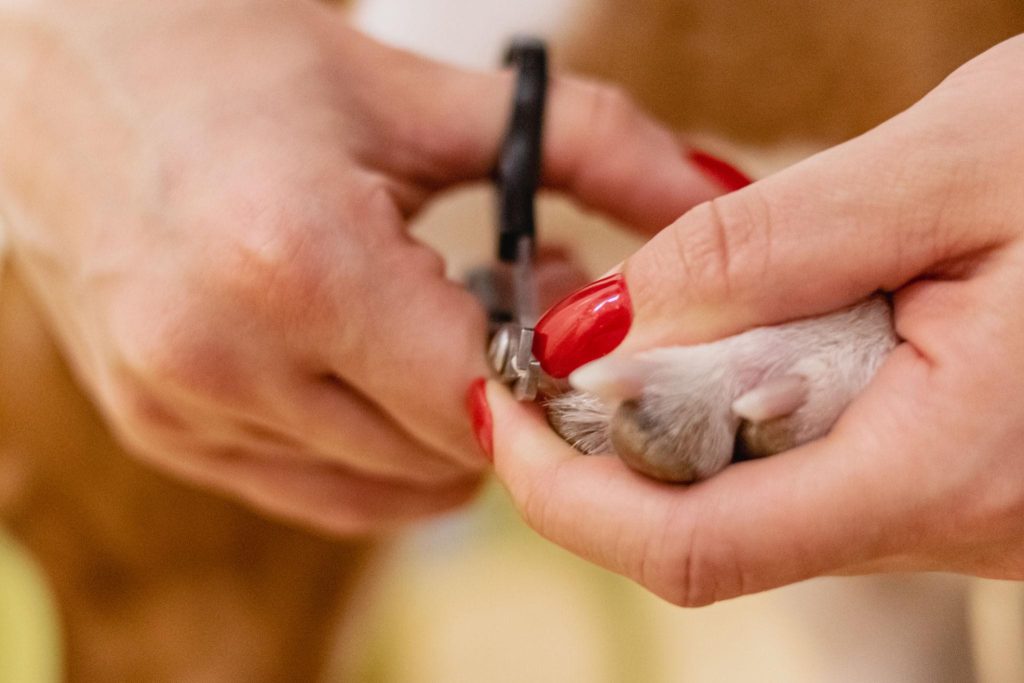
Step 3: Hold the Paw Correctly
Gently support the paw.
Place your thumb on the pad and your finger above the nail to extend it slightly for a better view.
Avoid squeezing too tightly.
Step 4: Find the Quick
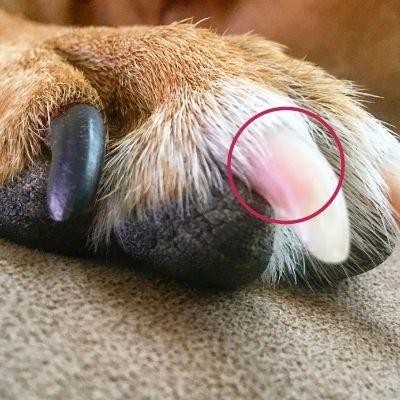
The quick is the blood vessel inside the nail.
Light-Coloured Nails
The quick is usually easy to see as the pink section inside the nail.
Trim only the white tip.
Black Nails
Black nails require extra care.
Trim tiny amounts at a time.
When the cut surface starts showing a small white or grey centre with a darker dot appearing, you’re approaching the quick and should stop.
Step 5: Trim Small Amounts
Never try removing a large section.
Instead:
- Cut only 2–3 mm at a time.
- Check after every cut.
- Continue until the nail no longer touches the floor.
Small cuts dramatically reduce the risk of hitting the quick.
Step 6: Smooth Rough Edges
Use a nail grinder or file to remove sharp edges.
Many owners prefer finishing with a grinder because it creates a smoother nail and offers greater control.
What Happens If You Cut the Quick?
Don’t panic.
Even experienced groomers occasionally nick the quick.
If bleeding occurs:
- Stay calm.
- Apply styptic powder.
- If unavailable, use cornstarch as a temporary measure.
- Apply gentle pressure.
- Offer treats and stop the session if your dog becomes distressed.
If bleeding continues for several minutes or seems excessive, contact your veterinarian.
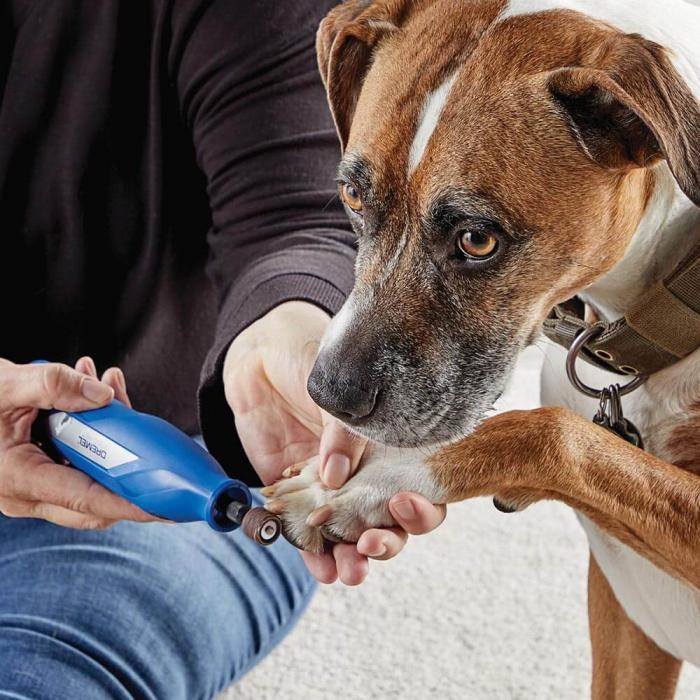
Clippers vs Nail Grinders
| Clippers | Nail Grinder |
|---|---|
| Faster | Greater precision |
| Less noise | Smooth finish |
| Ideal for experienced owners | Better for black nails |
| Budget-friendly | Less chance of cutting the quick |
Many professional groomers use both—clippers to shorten the nail and a grinder to finish it smoothly.
Tips for Dogs That Hate Nail Trimming
If your dog resists nail trims:
- Start by handling their paws daily.
- Introduce the clippers without cutting.
- Reward every positive interaction.
- Trim one nail at a time.
- Keep sessions under five minutes.
- Never punish fearful behaviour.
Positive reinforcement builds confidence over time and is consistently recommended by veterinarians and behaviour experts.
Common Mistakes to Avoid
❌ Cutting large sections at once
❌ Using blunt clippers
❌ Rushing the process
❌ Forgetting dewclaws
❌ Trimming an anxious dog immediately after excitement
❌ Ignoring overgrown nails
Frequently Asked Questions
Can I Cut My Dog’s Nails Myself?
Yes. Most owners can safely trim their dog’s nails at home after learning the correct technique.
Is It Better to Clip or Grind Dog Nails?
Both methods are effective.
Clippers are quicker, while grinders offer greater precision and smoother results.
How Short Should Dog Nails Be?
They should not touch the floor when your dog is standing naturally.
Do Dogs Feel Pain When You Cut Their Nails?
The nail itself contains no nerves.
Pain only occurs if the quick is cut.
Can Puppies Have Their Nails Trimmed?
Absolutely.
Starting young helps puppies become comfortable with nail care throughout life.
Final Thoughts
Learning how to cut your dog’s nails is an essential part of responsible pet care. Regular nail trims help prevent pain, improve mobility, and reduce the risk of broken nails and long-term joint issues.
Take your time, trim only small amounts, reward your dog generously, and don’t worry if you only manage a few nails during each session. With patience and consistency, nail trimming can become a routine that both you and your dog tolerate—and may even come to enjoy.